WordPress is one of the most popular CMS (Content Management System) blogging systems used to easily organize, manage, and create content on web pages.
Although most people are used to using WordPress through its graphical interface, another alternative management method can be used.
WP-CLI offers just that - it allows users to manage their installations via commands directly in the terminal. At Jump Hosting, we provide WP-CLI as part of every hosting account with an active SSH or dev pack.
Many different actions can be performed via this interface - updating WordPress, installing, creating backups, creating posts, and many other functions.
The big advantage of managing WordPress in this way is automation. If you have a large number of installations, you can easily automate the process of updating your core, components, themes, etc.
The WP-CLI interface is a package that is included and free to use for all users and all shared hosting plans. The command for accessing the command line is "wp". In this article, we will take a look together at some useful and interesting uses of WP-CLI

Installing WordPress From the Command Line With WP-CLI
To start the installation, we need to download WordPress and create the configuration file:
wp core download --version=6.4.2
wp core config --dbname="database_name" --dbuser="database_user" --dbpass="database_password"The parameters of this command are:
- --dbname - name of the database in which WordPress is to be installed.
- --dbuser - user to access a database
- --dbpass - password to access the database

Once you've done that, we can proceed with the installation. The direct command for the WordPress installation is as follows:
wp core install --url="your_domain_name" --title="Your Blog Title" --admin_user="admin" --admin_password="your_password" --admin_email="your_email"In it, the parameters have the following meaning:
- --url -
- --title -
- --admin-user -
- --admin_password -
- --admin_email -

WordPress Theme Installation With WP-CLI
The theme installation commands are:
wp theme install <име–на–темата>
wp theme activate <име–на–темата>
Installing plugins via WP-CLI
The installation of plug-ins, also known as plug-ins, is extremely simple and is similar to the installation of themes. It is carried out using the following commands:
wp plugin install <име–на–приставката>
wp plugin activate <име–на–приставката>
Here's a detailed article on how to install and update plugins with WP-CLI.
Upgrading an Existing Installation With WP-CLI
First, we need to check our current version with the wp core version command. Then we can proceed with the update. This is done with wp core update. Let us not forget to update the database with wp core update-db. Finally, we can run a version check again to make sure the upgrade was successful:

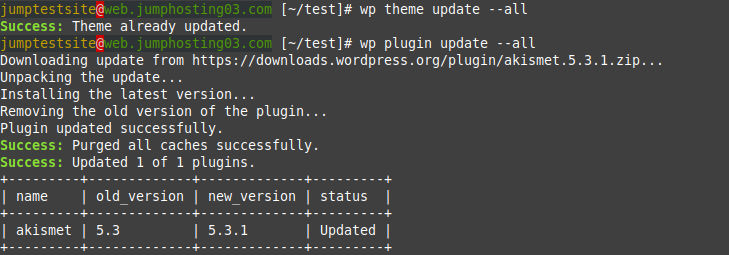
Finally, we can update themes and plugins with the commands wp theme update --all and wp plugin update --all.

Change a domain name with WP-CLI
If you want to change the domain name used for the WordPress website itself, you can easily do this with the following command:
wp search-replace 'olddomain' 'newdomain' --all-tablesYou must replace the fields “olddomain” and “newdomain”. This changes the relationships in all tables and only applies to the database.

Additional commands
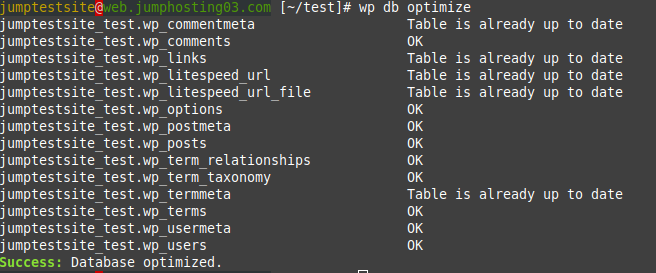
We can run additional commands to export, import and optimize the database of your WordPress installation.

Checking Current Themes with WP-CLI

As you can see, WP-CLI is a powerful tool, especially if you use it to automate common tasks. The examples above are just some of the most commonly used WP-CLI commands.
The interface has a much wider range of options and possibilities. For more information, you can always consult the official documentation.

