WordPress is the most widely used platform for creating websites on the internet. This is due to the open system for working with themes and plugins.
However, this also harbors risks and errors because WordPress is not a uniform system; it consists of three separate elements: core, theme, and extension (plugins).
All of these elements use their own features and functions developed by different authors, which leads to inconsistencies and conflicts in the operation of the individual elements.
For example, a theme may appear incompatible with the WordPress core due to an outdated version, or a WordPress plugin may conflict with the core and theme because it has been discontinued by the author's support and has not been updated in the last 5 years.
Very often, when using a website, you use exactly those applications that are specific, but unfortunately, they are no longer supported by their authors in new versions.
This inevitably leads to conflicts with other elements and the generation of critical errors that prevent the entire application from working.
There has been a critical error on your WordPress website!
This is the most common message that appears on the screen when there is a conflict between the installation elements.
Like any multitasking platform, WordPress offers a mode for analyzing and structuring the work of the application in the so-called "debug" mode.
In this article, we will show you short examples of how to solve the most common critical errors related to WordPress and how to find out which element is in conflict.

1. Log Files
Let's take a look at how you can use log files to analyze the causes of critical WordPress errors:
PHP Error_log
All available information about the operation of the application is stored in the so-called A-log file, which records every element of WordPress operation.
Using various directives, PHP enables the logging of errors and warnings in connection with the operation of the application with the corresponding PHP core.
If they are not activated, these functions can be activated with the following lines in index.php:
error_reporting(E_ALL); // Error/Exception engine, always use E_ALL

ini_set('ignore_repeated_errors', TRUE); // always use TRUE

ini_set('display_errors', FALSE); // Error/Exception display; use FALSE only in the production environment or real server. Use TRUE in the development environment.

ini_set('log_errors', TRUE); // Error/Exception file logging engine.

ini_set('error_log', 'your/path/to/errors.log'); // Logging file path
Another way to activate the log file is to use rules in the .htaccess file with the following directives:
<IfModule mod_php5.c>

php_flag log_errors on

php_value error_log ./path_to_MY_PHP_ERRORS.log

# php_flag display_errors on

</IfModule>
With our web hosting plans, these directives are set by default, and the corresponding error_log is created in the working folder of the domain. These settings can be accessed via the PHP Select field in the cPanel by selecting Options:

With WordPress, all errors and warnings can be displayed and saved not only in a file but also directly on the screen in real time, making it easier to search and troubleshoot the application in question.
To do this, we need to tell WordPress to run in debug mode by adding the following directive to the wp-config.php file:
define('WP_DEBUG', true);

define('WP_DEBUG_DISPLAY', true);

define('WP_DEBUG_LOG', true);

define( 'SCRIPT_DEBUG', false );
Here you will find a brief overview of each individual guideline and its function:
- WP_DEBUG: Turns on WordPress debug mode.
- WP_DEBUG_DISPLAY: Displays error messages and information in the HTML code of the page.
- WP_DEBUG_LOG: Stores error details in a log file.
- SCRIPT_DEBUG: Runs the “dev” versions of the core CSS and JavaScript files instead of the optimized (minified) versions.
The WP_DEBUG flag is switched off by default and must be activated. As a result, all errors, warnings, and information are displayed at the top of the website.
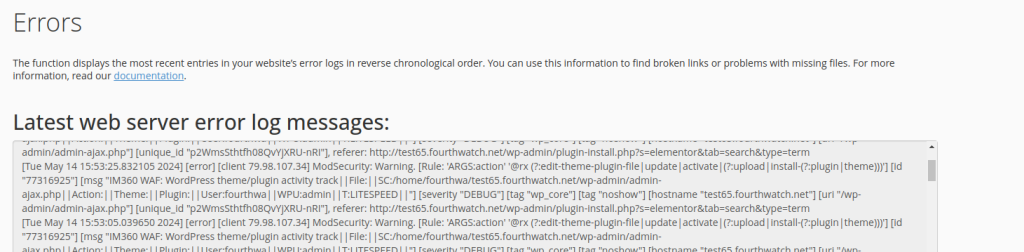
Web Server Error Log
You can use this log to informatively check whether the critical error is not caused by a server element that is blocking the operation of a critical plugin or theme file.
You can find the file and the entries it contains in your cPanel account, under category Metrics, and field Errors. This is the web server log that shows the communication between the WP application and the server environment.
2. Analyze and Trace the Error
In most cases, the critical error is generated with the code 500 and the message below:
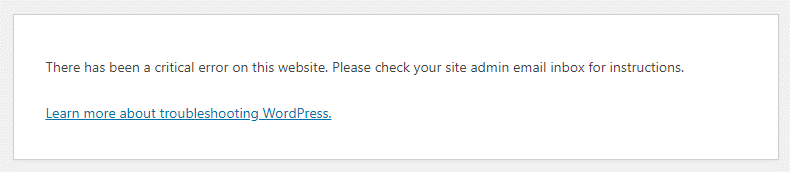
Unfortunately, the message itself does not provide enough information about which element is causing the error, only that a PHP error has occurred on the website.
This error occurs when one or more PHP scripts have stopped working prematurely or are unable to complete their processes.
To help users, WordPress has developed a feature that monitors whether a plugin or theme is causing the issue. If that’s the case, you’ll receive an email notification. You need to check your site admin email inbox for instructions and detailed information about the error.
In this email from WordPress, the users are informed about what exactly caused the error and after executing which script from the theme or plugin. The email looks something like this:

The email also contains a URL link that allows access to the website in "recovery" mode", as in most cases the error also affects the admin panel, which is also inaccessible.
With this solution, you can access the admin panel and fix the issue.
Viewing the error_log File
The critical error in the log file is easily recognizable because it is introduced as a Fatal Error. Let us take a look at an example of this:
[15-May-2024 10:51:30 UTC] PHP Fatal error:  Uncaught Error: Class 'Elementor\Core\Common\Modules\Connect\Module' not found in /home/cpaneluser/public_html/wp-content/plugins/elementor/core/common/app.php:69

Stack trace:

#0 /home/cpaneluser/public_html/wp-content/plugins/elementor/includes/plugin.php(767): Elementor\Core\Common\App->init_components()

#1 /home/cpaneluser/public_html/wp-content/plugins/elementor/includes/plugin.php(691): Elementor\Plugin->init_common()

#2 /home/cpaneluser/public_html/wp-includes/class-wp-hook.php(310): Elementor\Plugin->on_rest_api_init(Object(WP_REST_Server))

#3 /home/cpaneluser/public_html/wp-includes/class-wp-hook.php(334): WP_Hook->apply_filters(NULL, Array)

#4 /home/cpaneluser/public_html/wp-includes/plugin.php(517): WP_Hook->do_action(Array)

#5 /home/cpaneluser/public_html/wp-includes/rest-api.php(587): do_action('rest_api_init', Object(WP_REST_Server))

#6 /home/cpaneluser/public_html/wp-content/plugins/woocommerce/packages/woocommerce-blocks/src/BlockTypes/AbstractBlock.php(427): rest_get_server()

#7 /home/cpaneluser/public_html/wp- in /home/cpaneluser/public_html/wp-content/plugins/elementor/core/common/app.php on line 69
The first line tells us when and which file caused the error.
[15-May-2024 10:51:30 UTC] PHP Fatal error: Uncaught Error: Class 'Elementor\Core\Common\Modules\Connect\Module' not found in /home/cpaneluser/public_html/wp-content/plugins/elementor/core/common/app.php:69The example shows that the Elementor plugin has generated an error in the app.php file in line 69. The specific error refers to an incorrectly generated class.
The remaining lines show the operations and processes that were generated until the error occurred, counting from 0.
By reading this log, we can determine exactly what caused the critical error on your website.
Determining the Element That Generated the Error
The critical error can be caused by the following elements:
- The core of WordPress
- The connection between kernel and database failed
- The theme
- Plugins
- The PHP version
We will look at each element and the possible solutions in detail.
Critical Error in WordPress Core
Like every system, WordPress also has a series of system files that form the core of the application and in which basic functions and processes are defined.
If the integrity of a system file is corrupted by a malicious attack or if it is missing from the installation, this results in the generation of a type error:
Fatal error: Uncaught TypeError: call_user_func_array(): Argument #1 ($callback) must be a valid callback; function "wpse242371_remove_editor_from_some_pages" not found or invalid function name

in /home/cpaneluser/public_html/wp-includes/class-wp-hook.php:308
Let us analyze the error. To begin with, we see that it is generated by the system file class-wp-hook.php in example line 308.
In this case, it is an undefined function. It is possible that a plugin was installed that added the function in question, and when it was removed, it remained undefined because the system file was not modified.
Possible solutions:
Option 1: If we have a system backup from before the date of the error, we can restore it from an archive to the last date when the application worked correctly.
Our hosting environment uses the JetBackup5 tool. It is important that we restore both the database and the application files.
Option 2: Restore only the system files of a new installation or the specific file that caused the error. Several steps are required for this option:
- Step 1: We check the version of the kernel we are using, for example, 6.5. Using the WordPress Manager from Softaculous, we perform a fresh install of version 6.5. of a sample subdomain, e.g., test.domainname.tld.
- Step 2: Using the cPanel file manager, we can copy the core files of the clean installation from the subdomain to the installation with the generated error. It is extremely important to back up the configuration files and the content of the website. Therefore, we should not overwrite the following files: wp-config.php, .htaccess, and the wp-content folder and all the files it contains, as it contains information about the current website and all the elements, themes, and plugins that have been uploaded to the website.
Before we perform step 2, we can make a copy of these files in another location and then restore them once the kernel file restore is complete.
Another way to upload the system files is to have a clean installation of the respective WordPress version locally. You can use an FTP client and upload the files via this. However, you must first save the configuration files and the folder with the application content.
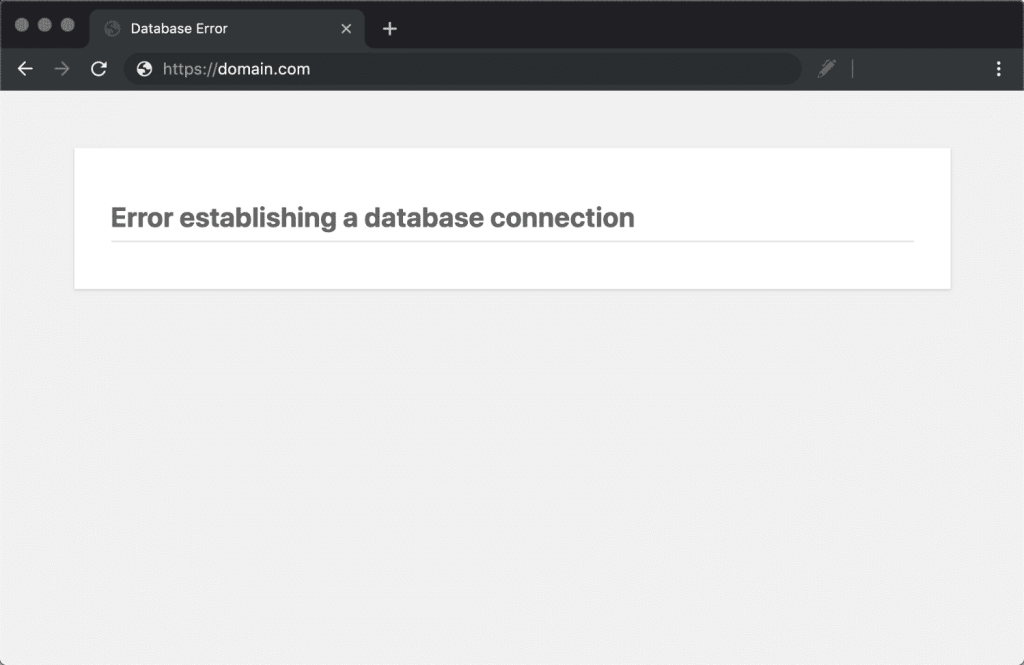
A Fatal Error Occurred When the Connection Between the Kernel and the Database Failed
This is one of the most common errors that can be caused by the following reasons:
- Incorrect database input
- Corrupted database
- Corrupted WP installation files
- Database server case study
- Increased traffic or server limits reached (hosting plan)
Incorrect Access Data Entered for the Database
The most common cause of this error is incorrectly specified access data for the database. We can check which database our installation is bound to by opening the wp-config.php file and checking the following directives:
// ** Database settings - You can get this info from your web host ** //

/** The name of the database for WordPress */

define( 'DB_NAME', 'database_name_here' );

/** Database username */

define( 'DB_USER', 'username_here' );

/** Database password */

define( 'DB_PASSWORD', 'password_here' );

/** Database hostname */

define( 'DB_HOST', 'localhost' );

/** Database charset to use in creating database tables. */

define( 'DB_CHARSET', 'utf8' );

/** The database collate type. Don't change this if in doubt. */

define( 'DB_COLLATE', '' );
These directives specify the name of the database, the user who has full rights, and the password.
These must exactly match the database information in cPanel, in the MyDataBases field. If you have activated this option, you can create an additional file in the installation, for example, with the name dbtest.php. It should contain the following code:
<?php

$test = mysqli_connect('localhost', 'db_user', 'db_password');

if (!$test) { die('MySQL Error: ' . mysqli_error()); }

echo 'Database connection is working properly!';

mysqli_close($testConnection);
This file is executed via https://yourdomain.com/dbtest.php. If an error like this is returned after execution:
MySQL Error: Access denied for user 'db_user'@'localhost'(using password: YES)We must check that the user's password is correct and, if necessary, change it in cPanel to the password described in the application's configuration file.
Lack of full database rights
A second reason for the error is that the user does not have full rights to the database. Using cPanel—the MyDataBases field — we can check what rights the user has and whether he is correctly bound to the database.
After making sure that everything is correct, we test the database again, and if everything is OK, we should get the following message:
Database connection is working properly!
Remember to remove the dbtest.php file from the installation after the tests.
Next, let us see if our database data is correct but the database itself is corrupted for some reason.
This can happen if you have installed and removed plugins, which in turn have created and deleted many additional tables in the database itself.
Normally, you will get the error message on the WordPress site that the application could not connect to the database, but if you go to the admin panel, you may see the following error:
“One or more database tables are unavailable. The database may need to be repaired“.
This surely means that there are still broken tables that need to be repaired.
There are several methods for doing this, and we will briefly describe a few simple steps for checking and fixing them.
- Database fix with directive in wp-config.php
WordPress has a database repair mode. To activate it, you need to add the following directive to wp-config.php:
define('WP_ALLOW_REPAIR', true);The guideline is inserted after the last line in the file and called up with a direct link from the following address:
https://yourdomain.com/wp-admin/maint/repair.phpIn the window that now opens, you have the option of repairing the database or repairing and optimizing it at the same time.
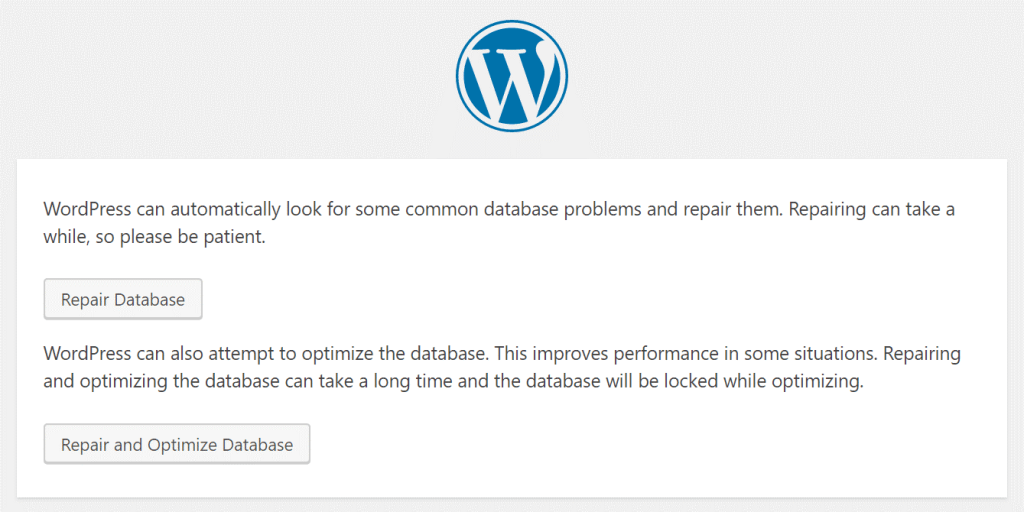
After the basic repair has been performed, you must remove the added directive in wp-config.php to exit repair mode.
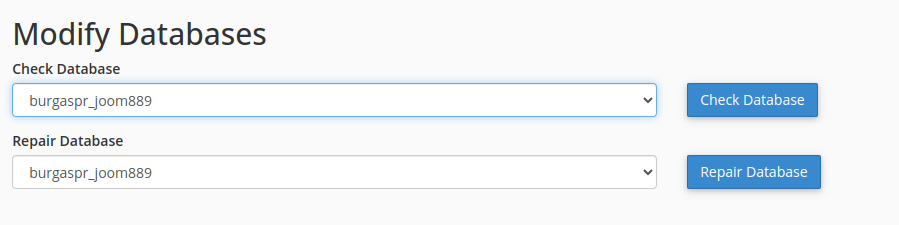
- Repair database in the cPanel from the MyDataBases field
Another option for repairing and optimizing databases is offered by cPanel in the MyDataBases box.
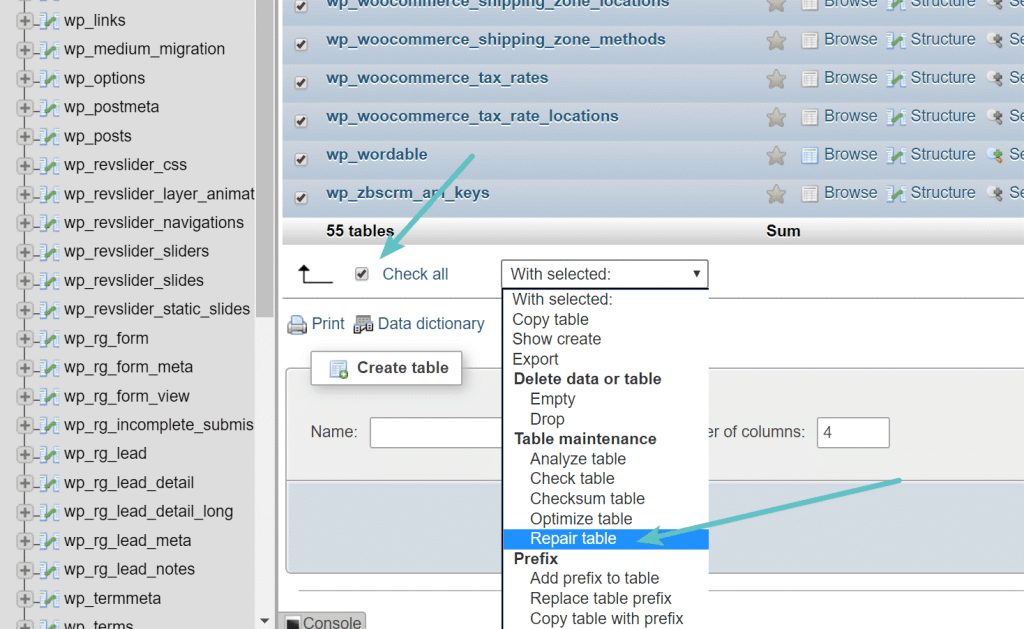
You can also optimize and repair the database using the PHPMyAdmin functions.
- Repair database with the WP-CLI command
The last method we suggest is to use a WP-CLI command that has an identical effect to those mentioned: wp db repair.
At the beginning of this article, we pointed out that database-related errors can also be caused by corrupted (hacked) core files of the WordPress platform.
The files are restored using the method already described, which applies to each individual critical error issue.
If we have analyzed the steps listed and have not found a problem, there is a possibility that the connection to the database is interrupted by a problem with the MariaDB server itself.
We strongly recommend that you contact our technical team if you find that the case study does not occur in your application and you have performed all other checks.
Sometimes the problem is due to the number of allowed connections the application can make to the database server.
Each server has a built-in limit, and for larger databases with large queries, we recommend using a database object caching tool such as Redis Object Cache.
High traffic on the website can also cause a database error if the limits of the plan or standalone server are reached, which leads to downtime and generates the error.
Do you know what else you can do with the WordPress Command Line Interface? Check out our article on how to manage WordPress plugin updates with WP-CLI to find out.

Critical WordPress Theme Error
A critical error can very often occur when updating the WordPress theme. It is generated in the theme files, causing the application to stop working. As a rule, these errors look like this in the error_log file:
Fatal Error: Uncaught Error: Call to undefined function tonda_core_is_theme_registered() in /home/cpanelUser/public_html/wp-content/themes/tonda/framework/modules/blog/shortcodes/shortcodes-functions.php:8 If we look closely at the file path, we will see that it is located in the /wp-content/themes/tonda/ folder. This is the working folder of the application's active theme, in this case, Tonda.
Here are some options to resolve the case:
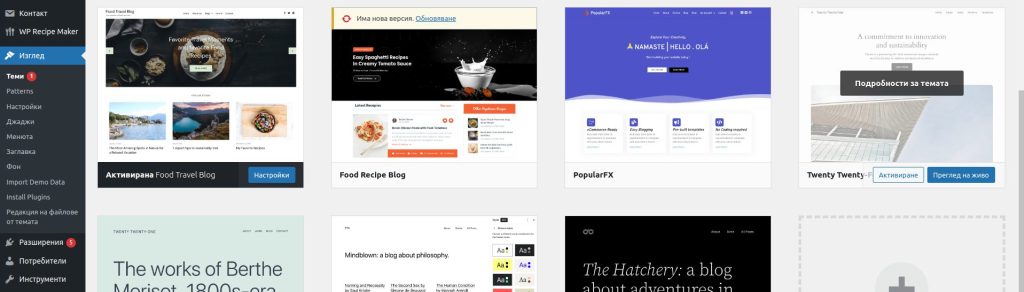
The first step is to change the theme to the default one because, in most cases, such a WordPress error also prevents access to the admin panel of the website. If we still have access to the admin panel, we can change the active theme directly from there:
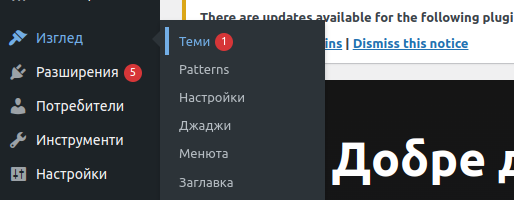
When we open the menu, we select the new theme—for example, Twenty-Twenty-Four (the default theme in 2024)—and activate it.
However, if we do not have access to the admin panel due to the error, the quickest way to change the theme is to rename it via the cPanel FileManager or the command line of the theme folder. In this the example, /home/cpanelUser/public_html/wp-content/ themes/tonda/ can be renamed to /home/cpanelUser/public_html/wp-content/themes/tonda_stop/
So when the website is opened, it will load with the default Twenty Twenty-Four theme. This fixes the error and gives us access to the admin panel. From there, we can reinstall the theme, in our example, Tonda.
We can also use the method we showed to replace the WordPress core files. If we have an archive of the theme itself, we can copy the files from it to the working folder /home/cpanelUser/public_html/wp-content/themes/tonda/
We can use FTP or the FileManager in the cPanel for this purpose. It is important in this process that you activate the theme after you have copied the files.
In case you need a full theme removal, check this article on how to delete a theme in WordPress.
Critical Error in WordPress Plugins
The most common reason for generating critical errors in the application is a conflict between different WordPress plugins. This is because most of them are created by different authors and are not optimized to work together. This is one of the main disadvantages of this type of open system.
An error related to the operation of a plugin would look like this in the error_log file:
Fatal error: Cannot declare class Less_Version, because the name is already in use in /home/cPanelUser/public_html/wp-content/plugins/ameliabooking/vendor/oyejorge/less.php/lib/Less/Version.php on line 9For both the methods described to fix the critical error in the theme and the plugins on your website, we need to check whether we still have access to the admin panel as a result of the error.
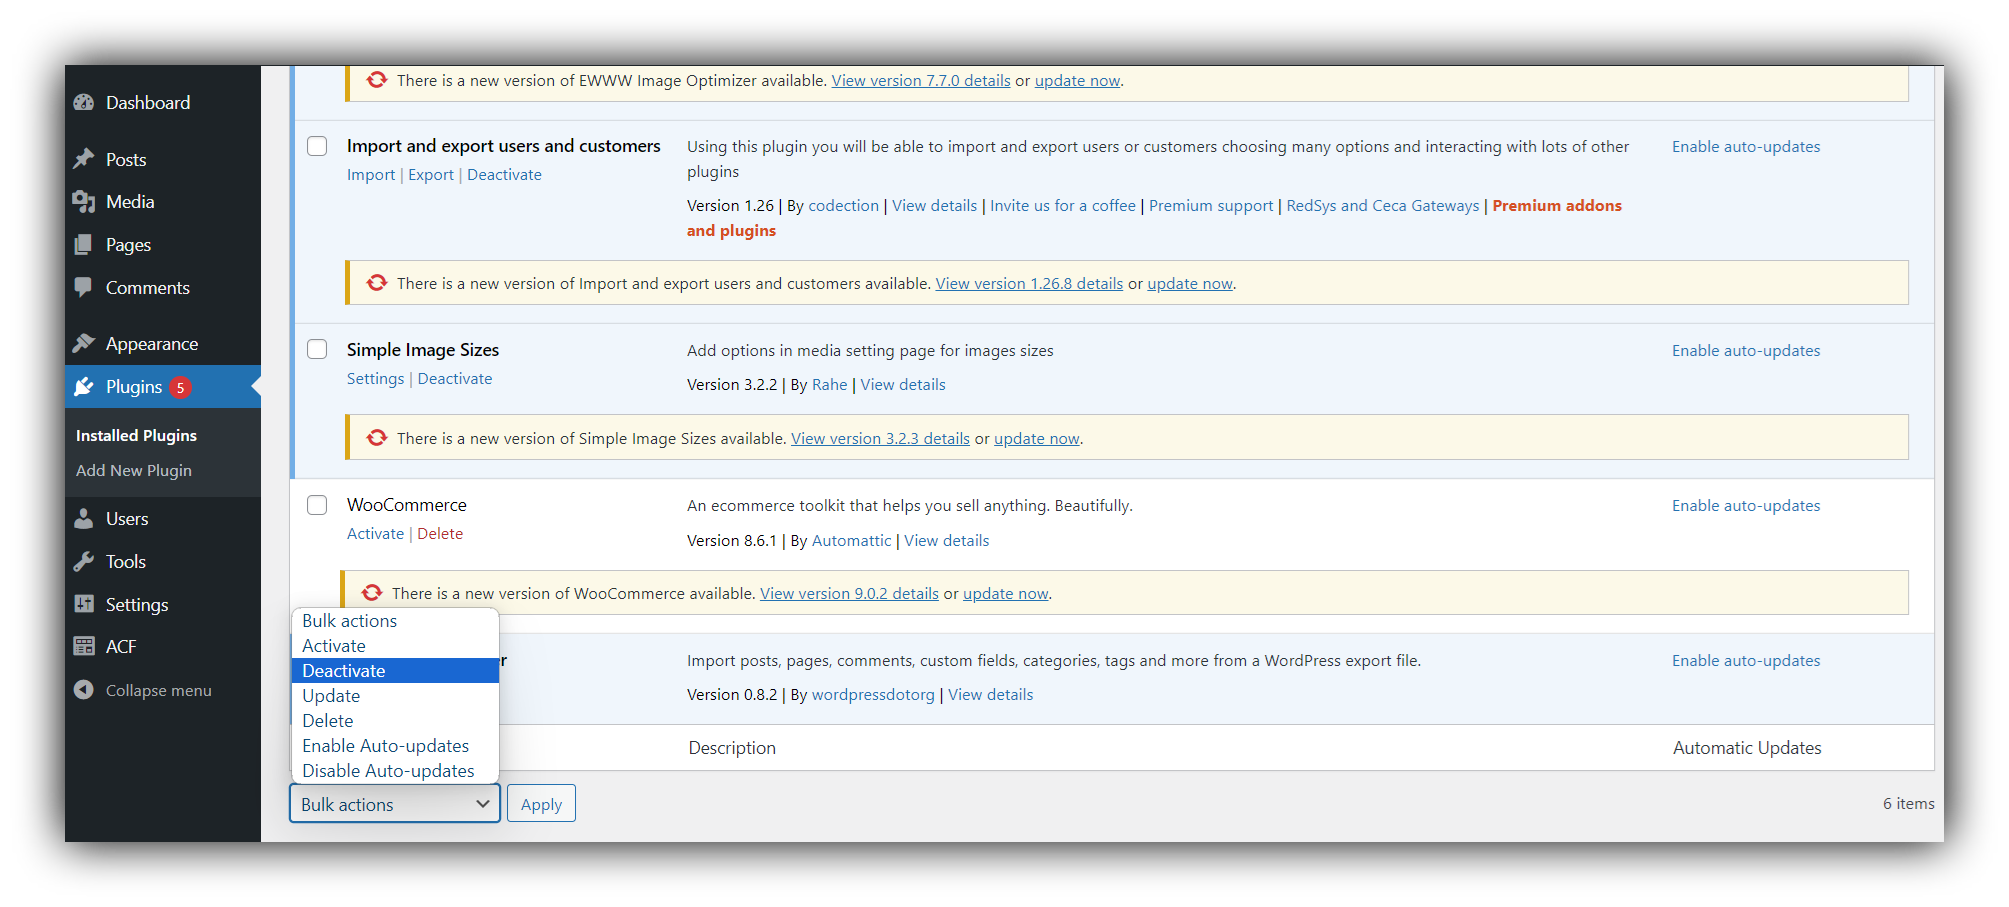
If this is the case, we can see from the error that /wp-content/plugins/ameliabooking/ is the plugin causing the problems. We deactivate the plugin directly in the admin panel, delete it, and install the latest available version.
However, if the error prevents access to the admin panel of the website, we can again use the Rename Folder option from the FileManager of the cPanel by changing the plugin folder from /home/cPanelUser/public_html/wp-content/plugins/ameliabooking/ to /home/cPanelUser/public_html/wp-content/plugins/ameliabooking_stop/
This will take us to the admin panel of the website, and we can reinstall the specified plugin.
Using the WordPress command line interpreter (WP CLI), we can also deactivate the specified plugin with the following command:
wp plugin deactivate ameliabookingThe command executed in this way will only deactivate the specified plugin.
In rare cases, if the plugins contradict each other, no error is generated in the log file, which makes it more difficult to analyze the case.
In this case, we can disable all plugins at the same time so that if the error continues to be generated, we can analyze the theme and the core for the error.
Here are some methods to stop plugins:
- Rename the /wp-content/plugins/ folder to /wp-content/plugins_stop/, for example, using the FileManager of the cPanel.
- Use a command line with the following command: wp plugin deactivate --all
- Deactivation via the admin panel of the website
The PHP version
Most critical errors are generated after a change of PHP version, as some libraries and class and function definitions that lead to these errors are missing in the new PHP versions.
When an error occurs, the first option you can test is to change the PHP version. The updated WordPress core version 6.5 requires you to use PHP version 7.4 or greater. If there is a plugin or theme in the installation that is no longer supported and updated, you likely use an older version of PHP, and this is the cause of the problem.
We recommend that you update all themes and plugins to the latest version when upgrading to remove old versions that may be using old definitions and functions.
One of the most common errors is related to PHP parameters. In Logos, it looks like this:
Fatal error: Allowed memory size of 104857600 bytes exhausted (tried to allocate 495616 bytes) in /home/cPanelUser/public_html/wp-includes/class-wpdb.php on line 1533This error indicates that the PHP memory limit is not sufficient. In this case, we can resolve the critical issue by increasing the corresponding limit via cPanel and the settings for the PHP version. Here, we also show you two other interesting methods for increasing the memory limit.
The first method consists of a directive in the wp-config.php file by adding the following line at the beginning or in the middle of the file:
define( 'WP_MEMORY_LIMIT', '512M' );The first part of the function shows that we change the value of WP_MEMORY_LIMIT, and the second part shows that we assign a limit of 512 MB as shown in the example.
The second method is to use a directive in the .htaccess file in which we add the following line:
php_value memory_limit 256MIt is important that the additional PHP modules for the respective version are also included because normally the error itself indicates which module is missing and must be activated via the cPanel --> PHP selection field.
Did you encounter a timeout error message? Read our guide to fix common WordPress timeout errors.
Summary
In this article, we have highlighted some of the most important critical errors for applications based on WordPress and explained how you can diagnose the case and recognize the causative element.
We have also seen that the system has a good set of diagnostic and repair tools, both via the administrative panel and the shell.
If we read the errors recorded in the logs well, we can find a quick and efficient solution to our cases without having to have in-depth programming knowledge.
Like any open system, WordPress has its weak points, but with each bug we fix, we will see that the platform works very flexibly and logically.
Remember to always create a snapshot of the website and database when making changes. You can always count on our professional team, who will enthusiastically participate in analyzing the performance of your application.
If you need help with your WordPress website, you should take advantage of our service, WordPress Support! A team of professionals with extensive experience will take care of your project 24/7, monitoring and responding in critical situations.