In practice, it is often necessary to create a copy of a particular website or clone it to a different domain name. For some more popular CMS systems, such as WordPress, plugins have been developed that offer similar functions. Our experience shows that such modules fail to perform this operation correctly more than once.
In our endeavor to help you as much as possible, we provide you with a universal method on how to create a copy of a website.
Preparation
To create a copy of an existing website, you need a location/directory where the copy can be stored. You need a subdomain or a new domain name that has already been added in cPanel. You can do this via the "Domains" menu.
You will also need an FTP client. In this article, we will use FileZilla.
Link to The Hosting Account
You must connect to your hosting account via an FTP client. You only need to enter the appropriate input data for :
- Host - You can enter the IP address or the name of the server;
- Username - Your cPanel user name;
- Password - Your cPanel password;
- Port - Enter 21;

*Note: You will receive the login details for the FTP client in an email when you set up your hosting account. If you have not saved the message, you can contact technical support to resend the data.
Download the Latest Files
Once the connection has been successfully established, the required files must be downloaded. To do this, create a directory with the name “temp" on your local drive. In the right-hand window of Filezilla, navigate to the directory that you want to download. In the current example, the directory is “public_html”. To start the process, right-click and then select "Download".
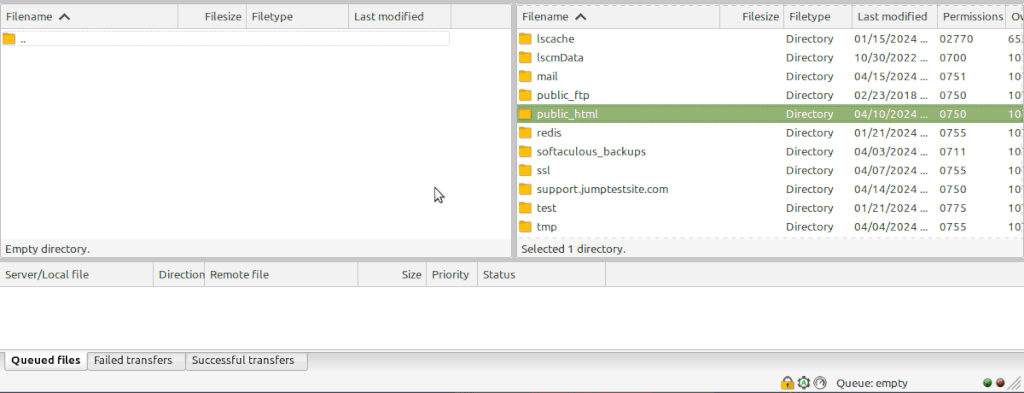
You are waiting for the process to complete.
Download Database
This action is carried out via cPanel -> phpMyAdmin.
*Note: You must know in advance which database your website uses. This information is often contained in the configuration file.
| CMS | Configuration file |
| Wordpress | wp-config.php |
| Joomla | configuration.php |
| OpenCart | config.php |
If you are still not sure, you can ask the documentation of the system you are using or your technical advisor.
After accessing phpMyAdmin, you must select the desired database in the left navigation and click on the button of the same name (Export) in the "Export" area.
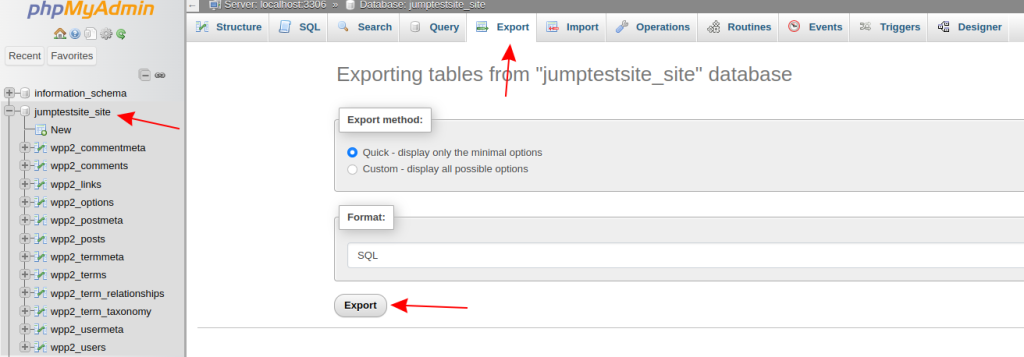
It starts by downloading a file with the .sql extension. It is possible that some browser plugins block this action and you will have to stop it temporarily.
Once the file has been successfully downloaded, you will have a copy of your website on your device.
Upload Files
You should have added the new domain/subdomain in cPanel and set the directory from which the files are uploaded accordingly.
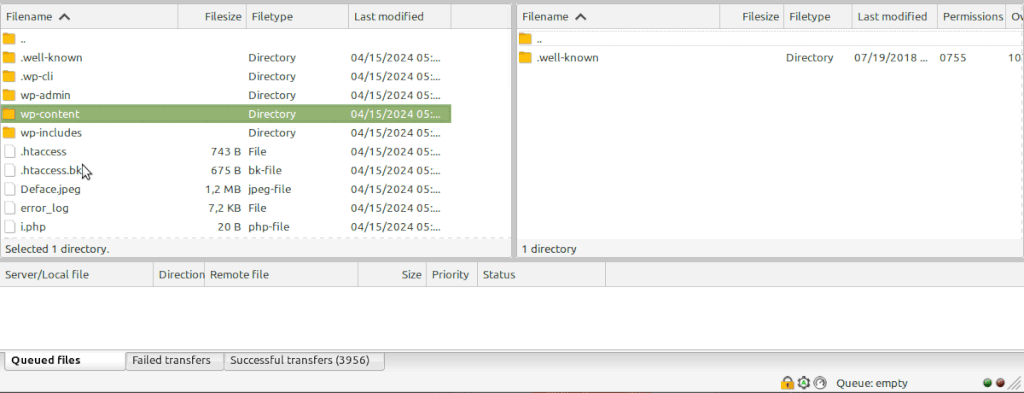
Access this directory in the right-hand field of the FTP client and open the directory you downloaded under point 2 in the left-hand field.
The files must be uploaded by right-clicking on each one and selecting the Upload option. Your website likely has many files and directories, and uploading them one by one is certainly a tedious process. Luckily, you can use the keyboard shortcut “ctrl+a” to select all files at once and apply a bulk upload option “Upload”.
*Note: If you have selected a keyboard language other than English, the keyboard shortcut will not work.
Wait until the process is complete.
Create a New Database
Call cPanel -> MySQL Database Wizard. From this field you should go through 3 steps, namely:
- Create a new database;
- Create a MySQL user;
- Add the user to the database and set the appropriate rights.
*Note: Save the password for this user, as you will need it later. For the rights, normally select the “All rights” button.
Database Placement
Before proceeding with the actual import, some editing is required. It is only natural that you want to change the address of your website because you are copying a new domain or subdomain.
For the purpose:
From point 4, you should have downloaded a “.sql” file that represents the database. For it to work properly, you need to replace the old domain name with the new one. To do this, open the relevant file with a text editor such as NotePad.
In the top navigation bar, select “Search” -> “Find" (or the keyboard shortcut “ctrl+f”). From here, select the “Replace” tab.
Enter your old domain in the "Find" field and the new one in the "Replace with" field and click on "Replace all".
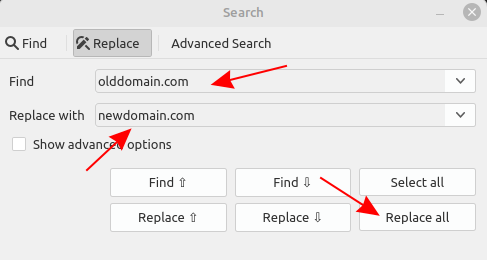
Do not miss the Save button.
Once edited, the database is ready to be placed. To do this, select the new database created in Ball 6 -> Import tab in the left navigation in cPanel -> phpMyAdmin.
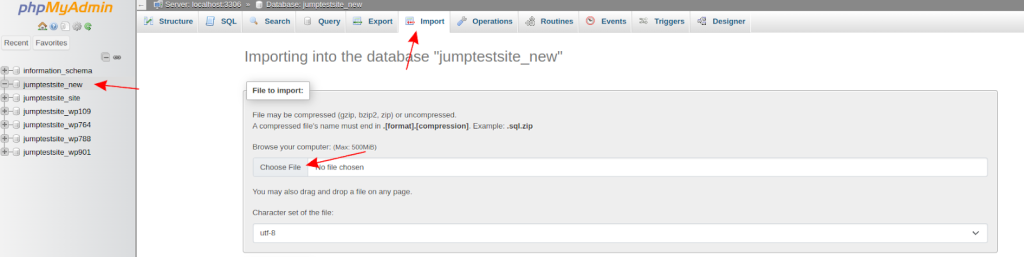
From here, select the “Select file" button, which opens a file manager. Call up the edited “.sql” file and select it. You do not need to make any further settings, simply click on the "Import" button.
You should receive a message that the database has been successfully mounted.
Editing the Configuration File for the Website
It is very important that you do not skip this step. You must change the data for:
- MySQL Database
- MySQL UserName
- MySQL UserName Password
As we have already mentioned, this data is usually stored in the configuration file of your website. In Wordpress, this file is called wp-config.php and looks like this:
/** The name of the database for WordPress */
define( 'DB_NAME', 'MYSQL_Database' );
/** MySQL database username */
define( 'DB_USER', 'MYSQL_Username' );
/** MySQL database password */
define( 'DB_PASSWORD', 'MYSQL_USER_PASSWORD' );
Save the changes and upload the relevant file if you have edited it locally.
If you have followed all the steps correctly, you should have a completely independent copy of your website. Please note that some pre-built systems require cache cleanup or additional editing of directory paths.
As an example, we can point to Opencart, and in the two configuration files (config.php and admin/config.php) you need to change the paths as well as the MySQL data. This is done by inserting the new directory that was specified when adding/creating the new domain/subdomain.
Eager for more knowledge? Here's our step-by-step guide on how to uninstall WordPress from cPanel with ease.